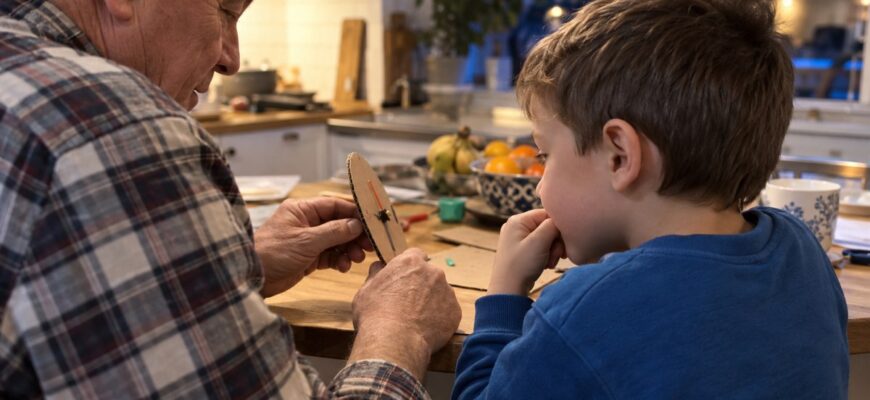
Teaching kids to tell time works well when you separate several connected ideas. What does each hand show? Why does the long hand use the same circle to represent minutes? How is a starting time different from the length of an activity? These questions belong together, but they do not need to arrive in one explanation.
Begin with familiar daily events and a real clock. Add whole hours, half hours, five-minute steps and short intervals gradually. If counting to sixty is still difficult, spend longer on whole hours and the order of events. A clear model is more useful than racing through every stage by a particular birthday.
- Separate a time from a duration
- Make a reliable model clock
- Step one: whole hours
- Step two: half past
- Step three: count minutes in fives
- Explore elapsed time on a line
- Three activities to try at home
- FAQ: learning to tell time
- Must a child know the five times table first?
- Why does my child confuse the hands?
- When should we introduce 24-hour notation?
- Do children need phrases such as quarter to?
- Can we use only digital clocks?
- What is a realistic first-week goal?
Separate a time from a duration
“We left at ten o'clock” identifies a moment. “We walked for twenty minutes” describes a duration. Show the difference on a paper strip: a mark indicates when the walk starts, and a length of line represents how long it lasts. Begin by comparing familiar activities rather than requiring clock calculations immediately.
You can set a timer for one minute and notice when it ends. Then predict what might fit into a similar interval and discuss the result. The prediction does not have to be exact. Keep the activity exploratory instead of turning every estimate into a race that must be completed before a signal.
Make a reliable model clock
Draw a circle and place the numbers one through twelve in order. Use two hands with clearly different lengths and, initially, different colors. Name the short hand as the hour hand and the long hand as the minute hand. If both hands move independently on a homemade clock, model their coordinated movement carefully.
On a real clock, the hour hand moves gradually instead of staying exactly on one numeral for a whole hour. At 2:30, it sits halfway between two and three. A cardboard clock can accidentally teach the wrong position if an adult moves only the minute hand. Check both hands whenever you make a new example.
Step one: whole hours
Place the minute hand on twelve and the hour hand on four. This shows four o'clock. Try a few examples that change only the hour hand. Then swap roles: your child sets a time, and you explain which details helped you read it. This makes the reasoning visible in both directions.
Add a simple story: breakfast begins at eight, and a walk begins at nine. Keep morning and evening contexts separate at first. The same hand arrangement appears twice in a day, so context or a 24-hour notation will be needed later. First establish a dependable way to read whole hours from the clock.
Step two: half past
Move the minute hand from twelve to six. It has traveled halfway around the clock, representing thirty minutes. The hour hand has also moved halfway toward the next hour. When the short hand lies between two and three and the long hand points to six, the time is 2:30, or half past two.
Compare the digital notation and the spoken phrase beside the model. Ask which full hour has already passed and which one comes next. Avoid introducing quarter past, quarter to and every possible minute phrase in the same session. One stable relationship is enough for an initial activity.
Step three: count minutes in fives
There are five minutes between neighboring numbered positions for the minute hand. At one, it shows five minutes after the hour; at two, ten minutes; at three, fifteen minutes. Travel around the circle while counting in fives. At twelve, sixty minutes have completed an hour, and the minute display returns to zero for the next hour.
Try these examples: a long hand at three and a short hand just past seven show 7:15. A long hand at nine and a short hand between four and five, closer to five, show 4:45. A long hand at six and a short hand halfway between eleven and twelve show 11:30. Explain each hand before combining the answer.
Explore elapsed time on a line
Start with an interval inside one hour. Reading begins at 10:10 and ends at 10:25. Fifteen minutes have passed. Draw marks for 10:10, 10:15, 10:20 and 10:25, then count three five-minute gaps. Count the spaces between the marks rather than the number of labels on the paper.
Next cross an hour boundary. From 10:50 to 11:10, there are ten minutes to eleven and another ten afterward, making twenty minutes. Clock notation is not an ordinary decimal number: an hour contains sixty minutes. A timeline makes that boundary visible and offers a straightforward way to check a calculation.
Three activities to try at home
In “Toy Timetable,” draw cards showing breakfast, a walk and story time. Give each event a whole-hour start, arrange the cards and set the model clock. Check whether events that should happen in sequence accidentally overlap. Let your child make a timetable for you and explain the order.
For “Matching Times,” connect a clock drawing, a digital time and a spoken phrase. The notation 6:30 matches a minute hand at six and an hour hand between six and seven. For “Finish-Time Planner,” a game begins at 3:00 p.m. and lasts twenty minutes. It finishes at 3:20 p.m. Check whether the question asks for a time or a duration.
For additional practice, explore Logic and Mathematics, which includes elapsed-minute problems. When a word problem becomes confusing, the approach in helping kids solve math word problems is useful: identify what is known, what the question asks and which unit belongs in the answer.
FAQ: learning to tell time
Must a child know the five times table first?
Remembering every fact is not essential, but counting in five-minute steps helps. Write minute labels around a teaching clock and count together. Remove the labels gradually when the connection between numbered positions and minutes makes sense, then try an unfamiliar clock face.
Why does my child confuse the hands?
The roles of the hands and the two meanings of the numbers may still be mixed together. Return to separate questions about hours and minutes. Different colors can be a temporary aid, but check understanding later on a regular clock that does not supply that color cue.
When should we introduce 24-hour notation?
Introduce it after whole hours and morning versus evening are clear. Connect it to a familiar event: three in the afternoon is 15:00. Compare specific pairs on a full-day timeline before expecting instant conversion of many different times. Keep the notation consistent within each exercise.
Do children need phrases such as quarter to?
They are useful when those expressions are common in your child's daily life. Add them after reading minutes is reasonably secure. Compare minutes since the previous hour with minutes remaining until the next. For example, 4:45 is forty-five minutes past four and fifteen minutes before five.
Can we use only digital clocks?
Digital clocks are convenient for reading numerical notation. An analog model makes parts of an hour and movement around the circle visible. Use both if your child encounters both. Check understanding of the event and the interval, rather than only recognition of a familiar display.
What is a realistic first-week goal?
Choose a small observable goal: distinguish the hands, show a whole hour or explain one short interval. Use fresh but manageable examples. Avoid promising complete mastery in a fixed number of days. Notice a specific step that now makes sense and build the next activity from there.